
Creating a Dry Creek Bed
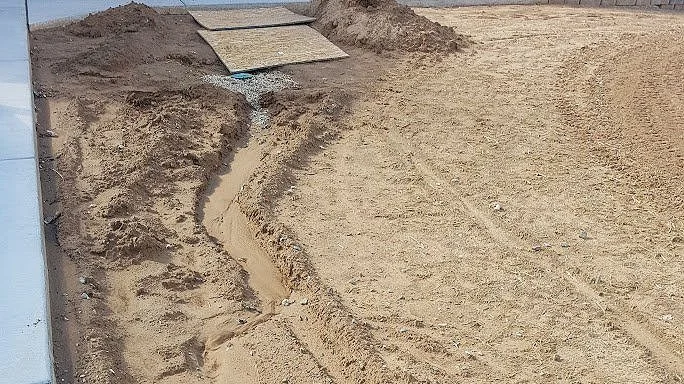
As we moved into our new construction home we had SO many new things to consider with a blank slate yard, but rainwater runoff solutions quickly moved themselves to the top of the list! We have one downspout that handles the majority of the runoff from the front of our home, and after we moved in we had one of the wettest, rainiest springs I can ever remember! A lot of runoff was coming up from a popup drain emitter that went under our sidewalk and came up next to our driveway, and as we got more and more rain, it started to undercut our driveway! So although we didn’t take photos of this part, at the lowest point of our planting bed area along the driveway we dug a pit about 2.5 feet wide and 3 feet deep and filled it with gravel so the water would drain into the soil instead. And that was when we decided that a dry creek bed was the best way to handle water in this area. In the photos, you can see the green popup emitter with small gravel around it to keep the dirt from washing away, and at the lowest point, you can see the gravel down in the water.
Letting the water begin the shaping.
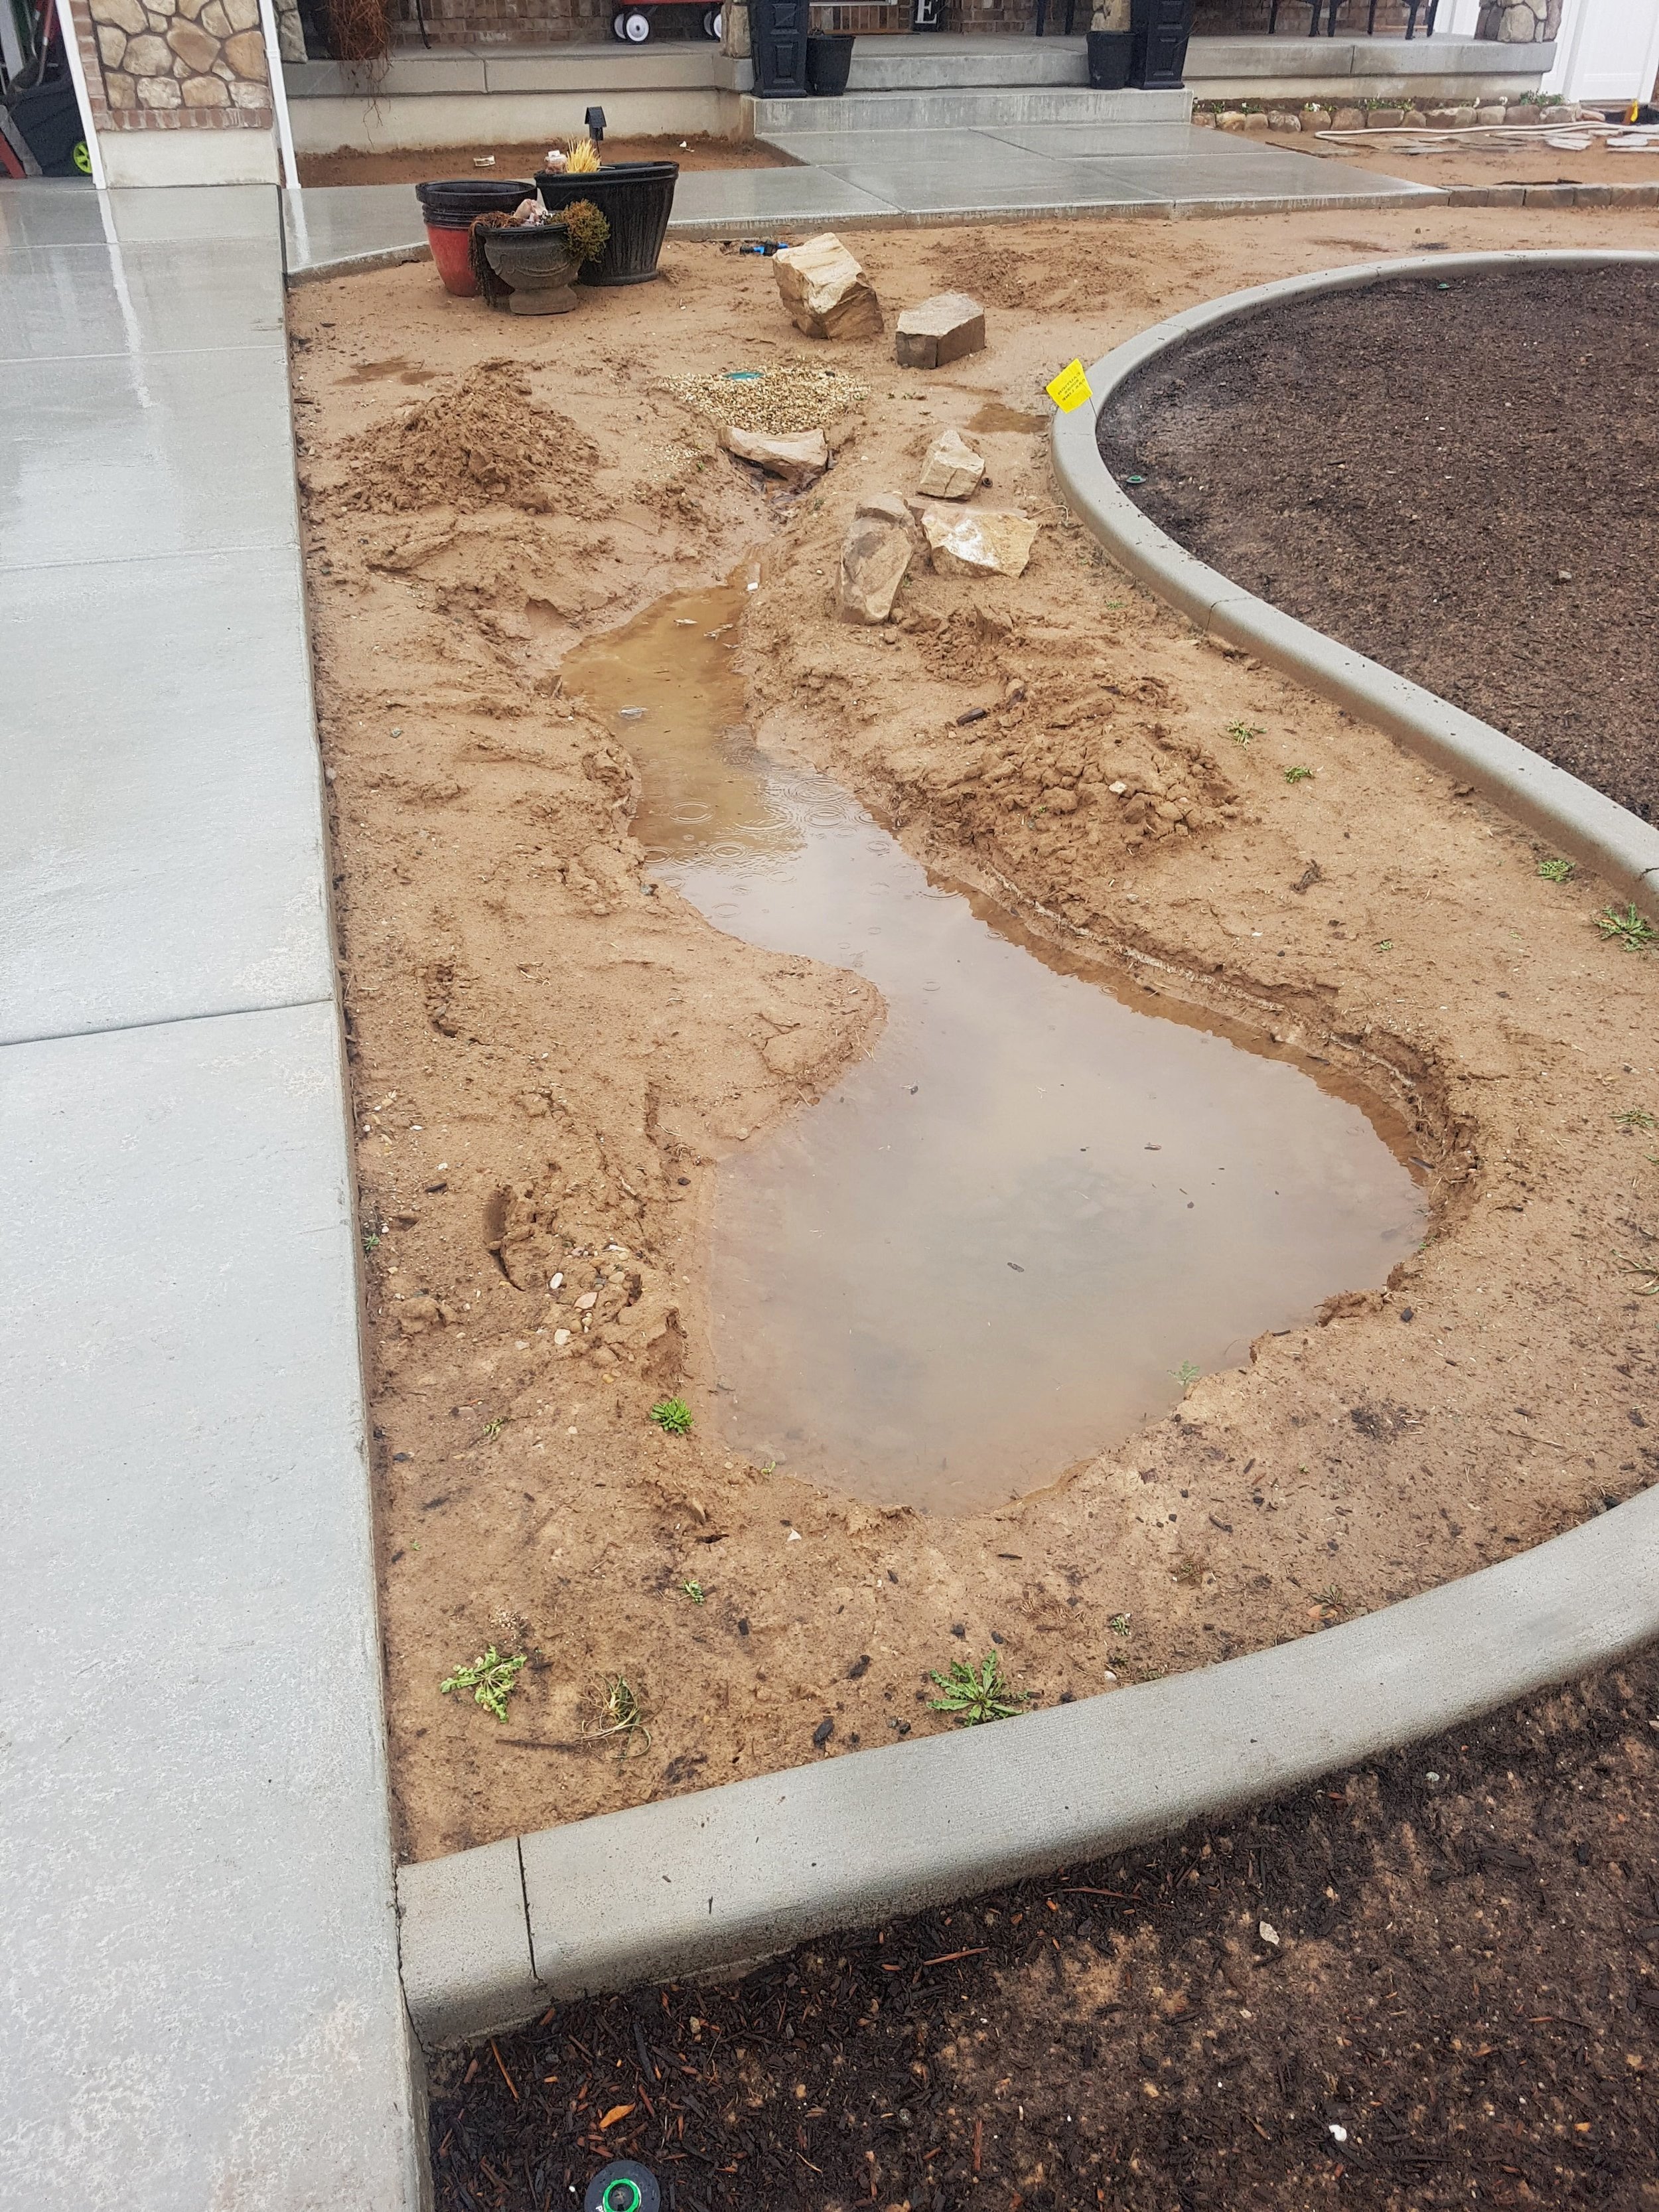
Adding some depth and a pit of gravel at the low point.
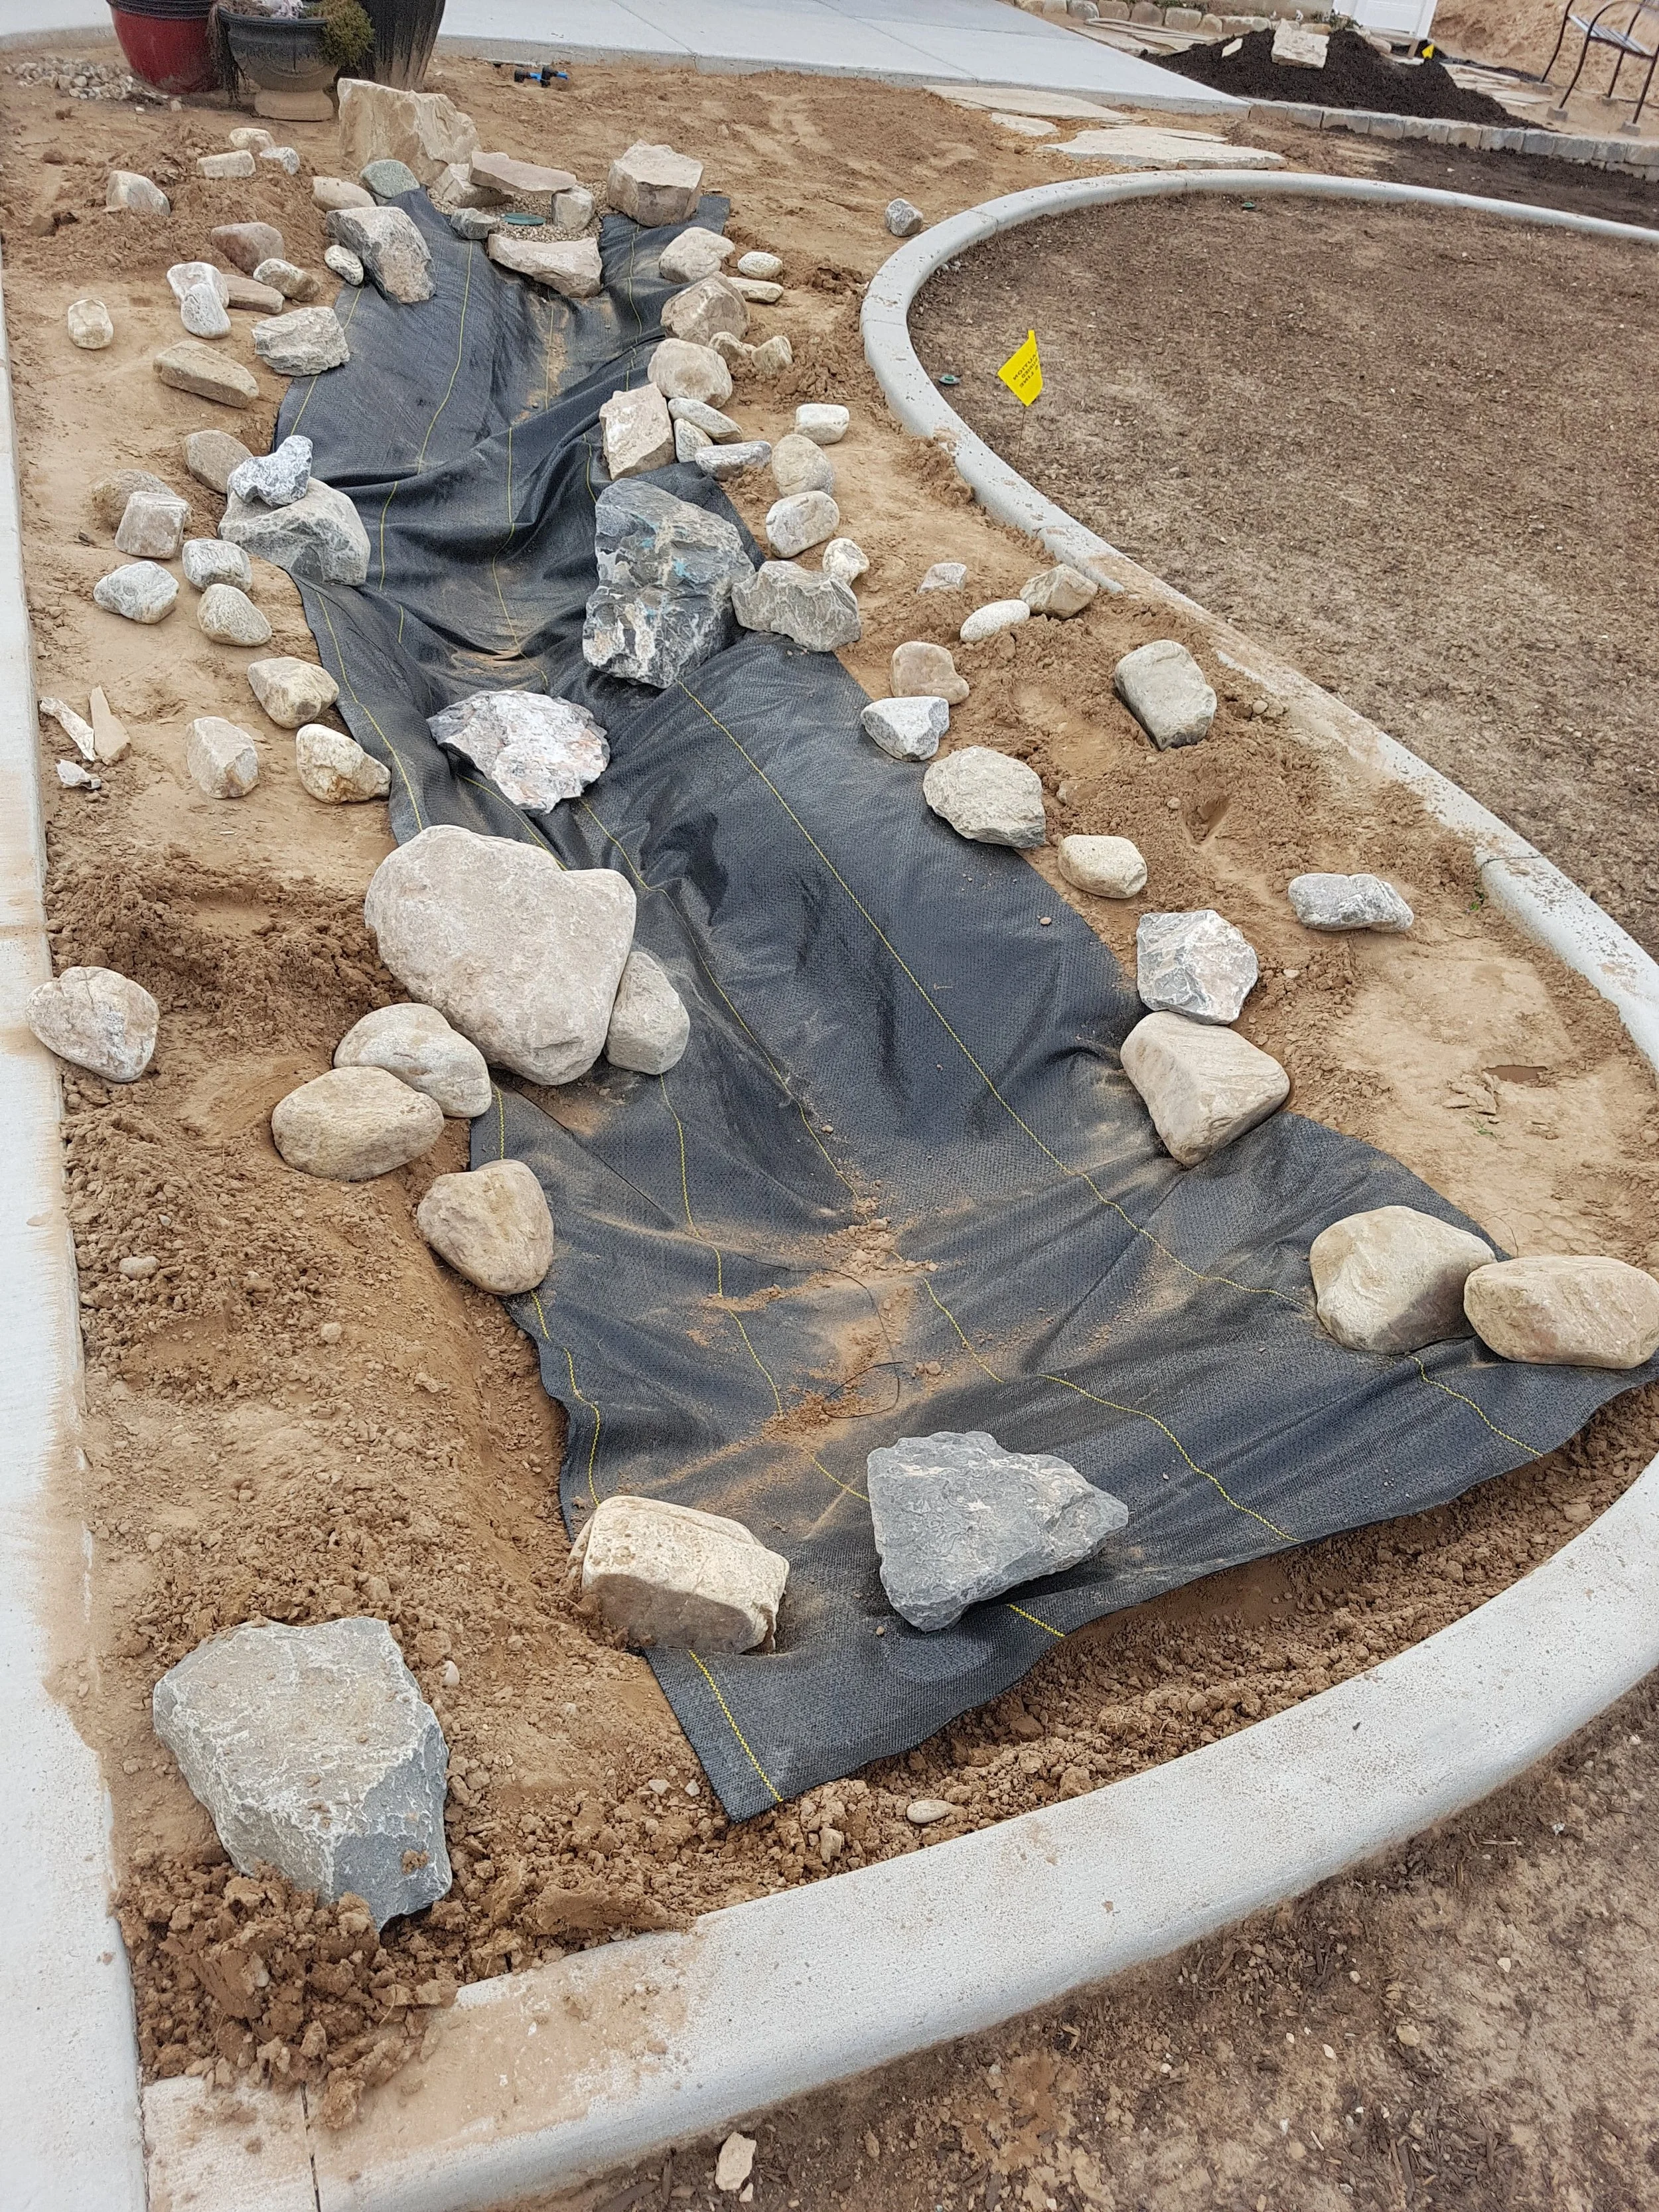
As we started to shape the dry bed, we just followed the shape that the water had started to make on its own! We dug a few ledges to place some larger stones, and I wish I had done this the whole way around the space! I ended up doing it as I was placing the rocks anyway, but it would have been easier at this point. Our soil is very sandy, so the digging was easy. After we had the shape we wanted, we laid down a piece of heavy-duty landscape fabric. I only use DeWitt Pro 5 because even a pair of scissors has a hard time cutting that stuff! Really, it’s worth the price and you can buy it at most garden centers, or online. It also has a felt-type backing on it that helps to keep it from sliding around. The purpose of the landscape fabric is to keep the rocks from settling into the soil over time and to keep the water cleaner as it fills up. I do get a few surface weeds that pop up between the rocks, but they have no soil to root into so they just pop right out, and I don’t get any weeds from below. You don’t want landscape fabric under plants to keep the soil healthy and promote good air and water flow, so any that wasn’t under rocks got cut off later. The fabric works out perfectly in this situation because it is porous which allows water to drain into the ground at any point.

A ledge for large stones halfway up all the way around would have been best!

Always remember that rocks are heavier than they look!

Lining the creek bed with landscape fabric.
When it came to choosing rocks, we went to the local rock yard and started selecting stones that were mostly rounded, but in nature the rocks along the edges of rivers aren’t as smooth because they haven’t been tumbled in the water. We wanted a few big rocks, but we mostly just chose them by what we could lift! Some of the rocks also came from our cabin property, so there is quite a variety of larger rocks. We chose a 1”-2” river rock for the bottom layer.

We chose a natural colored river rock for the bottom layer.
We started to place the largest stones first, resting them on the ledges. Then dig underneath the rest of the surrounding edges to add stones the rest of the way around. We leveled them as we went to make sure they were firmly in place. I didn’t want things sliding around and messing up the edges. It looks most natural to have at least the largest rocks look as if they are partially buried. It isn’t necessary to completely line the edges with larger stones. Having small stones come the edges would also work nice, but ours was fairly deep so it worked well to line it. The depth you choose depends on the amount of water you are trying to divert.
Placing a few rocks all around to hold things in place.

We continued all around the edges and trimmed the excess fabric.
It was kind of like putting together a puzzle as we set the stones together in the best ways they would fit. After the entire edge was lined with rocks, we started adding the smaller river rock to the bottom. It is just deep enough to cover all of the landscape fabric. If you can wash the rocks off before you add them it will keep more dirt from settling on top of the landscape fabric. You can create different looks by using contrasting stone colors and sizes at the bottom of the dry creek bed.

This is the exciting part! The bottom rocks support the rocks that fill the sloped sides.

We found a rock with a spillway for the first slope, and added a flat rock to disguise the pop up valve.

All filled up with a drip line around the edge for plants. Two side inlets and a bottom outlet too.
After the next big rainstorm we noticed that the grooves in the driveway were washing dirt into the dry creek bed, so we added the two rock inlets to deal with the erosion. You wouldn’t think it would be that much water, but it definitely was! And as it overflowed at the bottom onto the lawn it was also washing away that dirt, so more river rocks became an outlet. I ran one solid drip line around the perimeter that I use to run point-source emitters to surrounding plants.

It definitely fills up quickly in a storm! Excess water runs onto the lawn, and once the rain stops the rest of the water drains into the landscape. Our newly seeded grass wasn’t very good at controlling the erosion yet! I now judge how good a rainstorm is by how much, and how fast it fills up our dry creek bed.

As plants started to fill in it began to look more natural.

From the sidewalk looking down toward the road.

Hiding the popup valve.
We love how it turned out! It really does serve its purpose to handle the runoff, but it’s beautiful as well. Since you walk past it on the way to the front door I feel like it has become the main accent to our landscape. Maintenance requires checking for weeds periodically and raking out leaves in the fall and spring. I use a very soft-tined rake to loosen them and then a leaf blower to push leaves out onto the lawn to be collected. In winter it gives us a place to push all of our driveway snow. I also like to fill up my watering can with the rain water and use it to water my container plants if I can get to it quickly enough!
We didn’t really have any directions to go by when we started, just photos, so I hope this little tutorial can help give you some direction on how to start your own dry creek bed! Below are photos of ours in different seasons, because it looks very different in each. It is now three years old.


Below are photos of dry creek beds that I’ve taken of on garden tours. All very different and unique! Depth and style are dictated by the amount of water that it needs to divert. Some may not even handle water - and they don’t have to! They give the feeling of water even when empty, and that’s part of the beauty.


